Well I decided to take my Saturday night and finish the rest of the tear down. We helped a great friend move to a new place earlier in the day. This new place had some dogs that were very friendly, one hates those rubber horse heads. Lily demonstrates.....
After pulling off the rest of the cylinders and pistons, I could get started on the case. These actually looked pretty good. I'm going to take them somewhere I can accurately measure them so I know where I stand. But plus side of this mysterious place, its free!
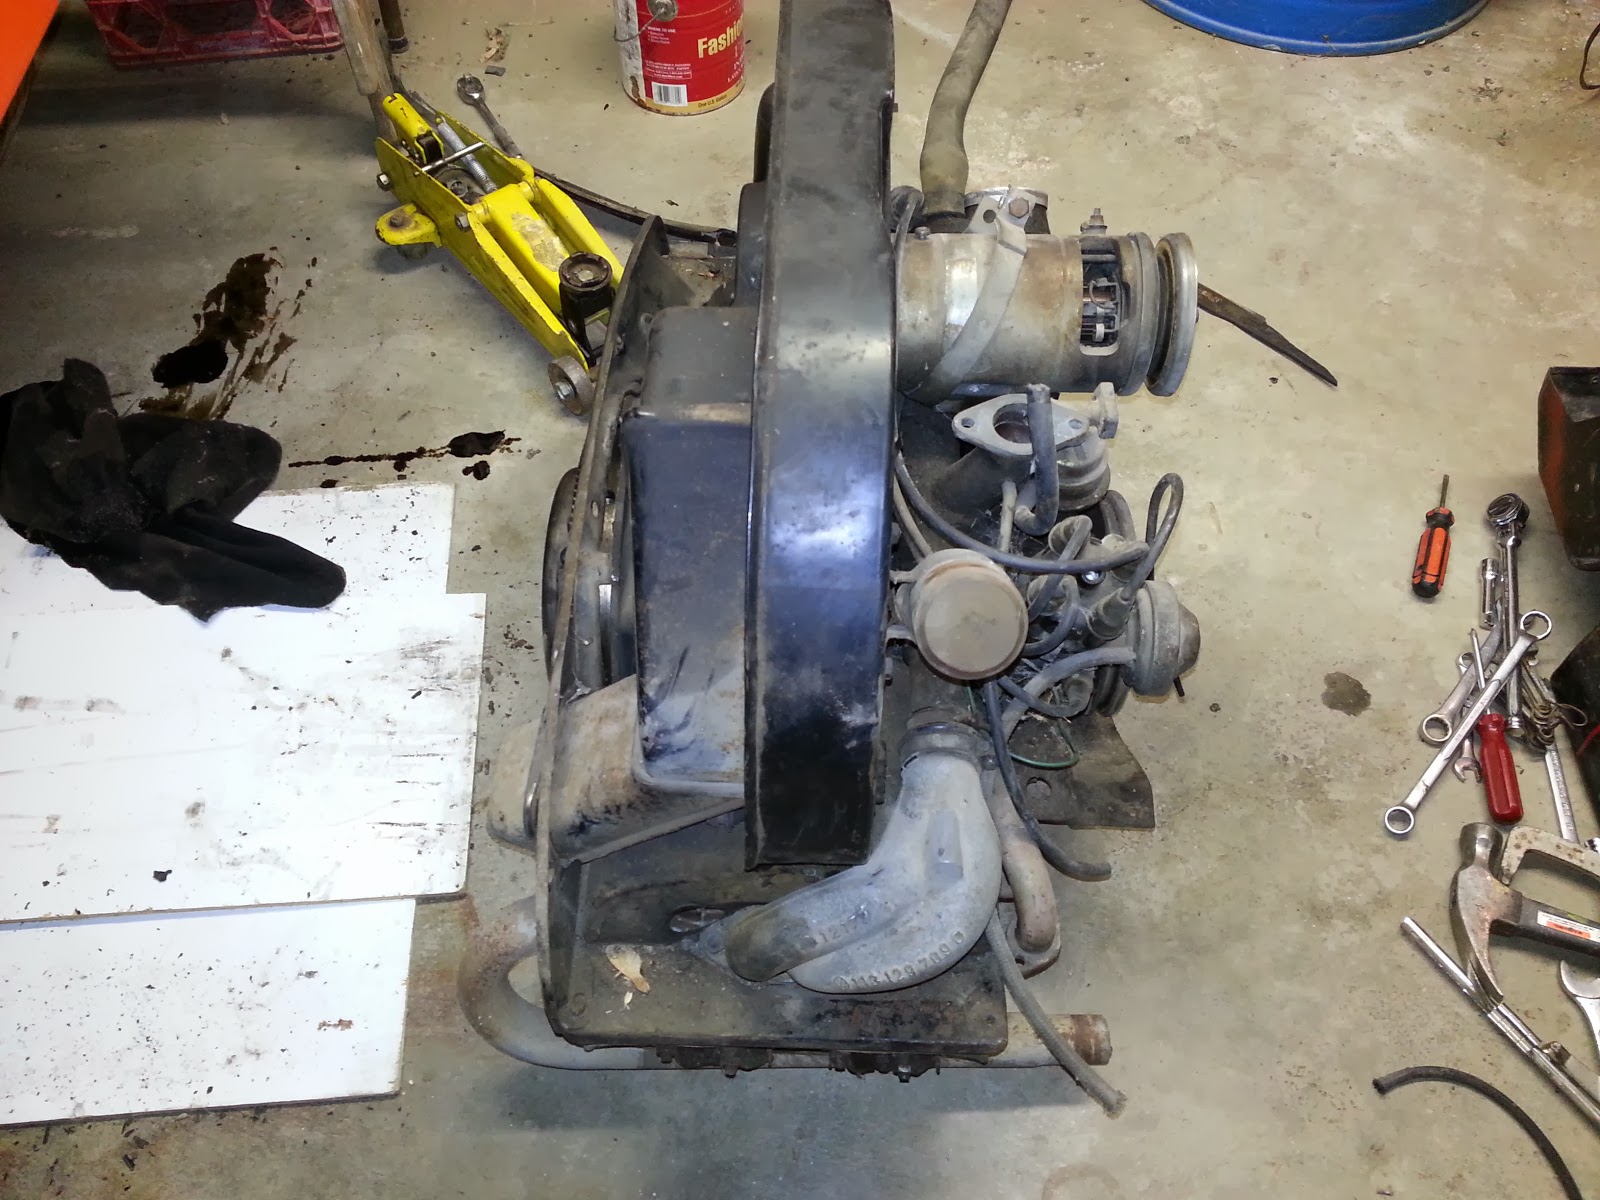
After all of the studs are removed and I can get started on taking the pulley off the front. This is needed first before taking the last of the tin off to get the oil pump off. The pump's studs are on both halves of the case, if you do not remove the pump first then you can't get the two halves apart.
It took a lot to get this off, there is a special tool that I should probably invest in if I am going to do more of this.
So I took to lifting the whole thing up by the pulley and using a mallet to beat the two apart. There was some heat involved and some WD-40, and 90 minutes later.
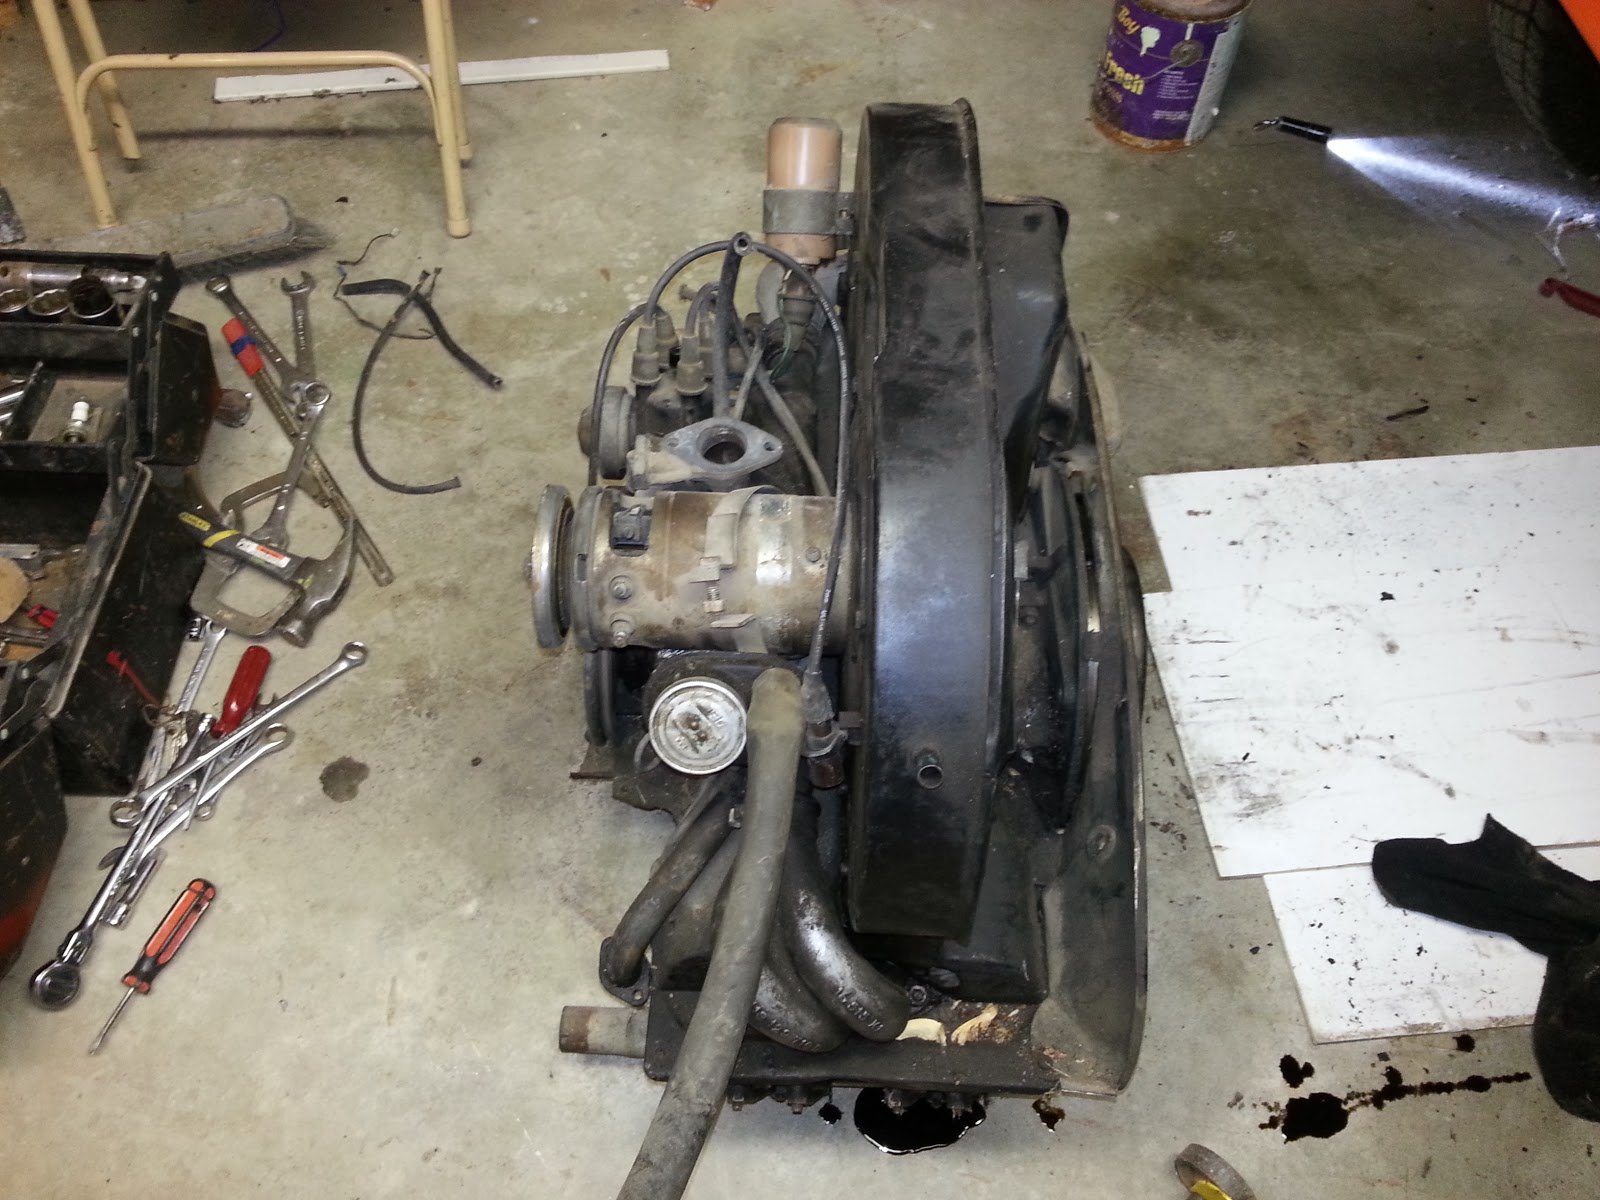
But then it was time to get the case apart. The pump came out very easy, and I took the clutch off the back. I don't have the tools to lock the flywheel or the 36mm socket to remove the gland nut. Again this will be done at that mysterious "free" place.
The case came a part some what easy, as easy as you'd expect with only mallets and patience. Again there's a special tool for this, again, I should probably invest in if I am going to do more of this.
I had some help with reading off the dimensions of the journals for the bearings. It was awesome being able to teach her things about motors.
She surprised me when I was explaining the four motions of the piston. She knew them because of the kids encyclopedias she has in her room. She could name off all what the motor did in each stroke of the piston. When this motors starts going back together, she'll have all the blanks filled in. Whenever I have issues with the car in the future, I'm sure she'll tell me what's wrong with it.
You can see the crank behind Lily in that photo, well some more bad news....That #1 rod? Well, it doesn't look good.
What ever caused the demise, it also gouged the crank. The bearing looks really bad, the whole bearing was mashed to one side of the rod. So it looks like the engine kit I'm going to need will have to include a crank. I need to get a new battery for my caliper so I can see if the case is going to need machining. If it does, I need to see if there is enough to do it. I really hope that I can reuse the case, I still don't have the birth certificate for Hubert, but I'm almost 100% positive that is his original case.
Lily helped me get everything packed up in marked baggies, this is in case we need to do more investigating.
To finish the night, we had some shells and cheese!
We also watched an episode of "How its Made", I had a Sodastream special mix....
Sunday, July 27, 2014
Looked around a little more for parts....
Well, I found suppliers with better reputations. And I figured if I'm going to need to have this case line bored, then might want to have it stepped up a bit.
Through some thorough reading on thesamba.com I've found that whenever someone asked what they should build with, the instant reply was a 1778cc. This is due to the little extra punch that it has over the stock 1584cc. So I've been looking around at kits.
I've just got to do more studying about which cam I want. I also need to get the motor more apart to figure out if the case needs line bored, or if it can be even.
Through some thorough reading on thesamba.com I've found that whenever someone asked what they should build with, the instant reply was a 1778cc. This is due to the little extra punch that it has over the stock 1584cc. So I've been looking around at kits.
![]() |
http://vwparts.aircooled.net/SCAT-Volkstroker-III-Engine-Kit-78-8mm-Crankshaft-p/volkstroker-iii-engine-kit-78.htm |
Labels:
car,
Hubert,
motor numbers,
oil,
restoration,
Thing,
Type 181,
Volkswagen,
VW
Wednesday, July 23, 2014
Deep motor teardown, looks good, oh wait, uh oh.....
So I started tearing in to the motor deeper today, pulling off heads and whatnot, only after getting a load of dishes started. I first started to notice that 2 of the studs on the right side (1 & 2) were bent, this might mean that the motor was rebuilt before.
But I took off the head for initial inspection. I don't fully know what specific things I'm looking for, but it does look like there was a lot of carbon buildup, not a big deal.
Then I started to take off the cylinders, again, they dont look too bad, but I should've waited until I had the motor more torn down before I power washed it. It caused a little bit of rusting in the cylinder from just sitting a week, but nothing deep. It can still be honed out if needed, haven't decied yet what I'm going to do for a rebuild kit.
I then started to take the studs out, and as I mentioned above a couple of them were bent. This may mean that it was rebuilt before, but it may mean nothing.
What concerns me the most is after I pulled off the #1 piston, there was considerable slop between the rod and the crank. I'm talking like 1/8", major. So there is a good chance I'll need new rods and crank.
I hope the rest of the build doesn't look bad. As long as the line bore that may be needed doesn't put it out of spec. I'd be pretty bummed if I had to change the case out.
But I took off the head for initial inspection. I don't fully know what specific things I'm looking for, but it does look like there was a lot of carbon buildup, not a big deal.
Then I started to take off the cylinders, again, they dont look too bad, but I should've waited until I had the motor more torn down before I power washed it. It caused a little bit of rusting in the cylinder from just sitting a week, but nothing deep. It can still be honed out if needed, haven't decied yet what I'm going to do for a rebuild kit.
I then started to take the studs out, and as I mentioned above a couple of them were bent. This may mean that it was rebuilt before, but it may mean nothing.
What concerns me the most is after I pulled off the #1 piston, there was considerable slop between the rod and the crank. I'm talking like 1/8", major. So there is a good chance I'll need new rods and crank.
Labels:
car,
flat 4,
Hubert,
motor numbers,
oil,
restoration,
Thing,
Type 181,
Volkswagen
Tuesday, July 22, 2014
More on the motor...And questions too!
I've been asking questions about the engine tin, should I powder coat or should I paint?
![]() |
All credits due to the owner of this picture, its not mine. |
![]() |
Motor case part number |
![]() |
Motor serial number |
![]() |
http://www.mamotorworks.com/VW/product/major-engine-overhaul-kit-for-1600cc-dual-port-engine-without-fuel-injection_300184 |
I do know one thing for sure, I need to get the books that everyone keeps talking about. Well at least the Wilson OR the Bentley book. These seem to be mentioned the most.
![]() |
http://www.mamotorworks.com/VW/product/how-to-rebuild-your-vw-air-cooled-engine-book_308340 |
![]() |
Not sure if this one is the correct one for a Thing but it seems the closest http://www.mamotorworks.com/VW/product/manual-robert-bently-factory-service_301240 |
I have a coworker who is currently building a 1933 Ford whom I've helped with an Arduino driven dome light controller, is going to loan me an engine stand, I just need to get the compatible bracket for the VW.
Again thanks to all the readers, and PLEASE leave comments below if you have suggestions or questions. I'm very excited to be working on this.
~James
Labels:
car,
flat 4,
Hubert,
motor numbers,
restoration,
Thing,
Type 181,
Volkswagen,
VW
Monday, July 21, 2014
Minor Motor teardown
I got the motor pulled out of Hubert last fall, and started planning........
![]() |
While still in the car (obviously) but with some exhaust, cooling tins, and bumper off. |
![]() |
And out, yes that's a paint can that was used as a jack stand, you would think I would have better options but I don't. |
![]() |
Very excited to finally get the motor out, its been since probably Y2K since I removed it for a clutch. |
I decided to put the motor on something that would move, I have a co-worker that will let me borrow his engine stand, but I don't really need to use it until I go to put it all back together. So I found a cabinet in the garage that hasn't moved since I bought it on a company auction. So I still had mobility I put that on a creeper. This looks very red neck, but I was desperate to get the project started.
To keep this going, I'm going to publish this post and start working on the next. As a side note, I joined the thesamba.com forums, full of great information!
Labels:
car,
flat 4,
Hubert,
motor numbers,
oil,
restoration,
Thing,
Type 181,
Volkswagen,
VW
Location:
Eagle, NE, USA
Subscribe to:
Posts (Atom)